跳转到主要内容

如何在AT32 MCU上使用FPU功能

<strong><font color="#4e5e9e">必要的代码准备 </font> </strong>

<strong>程序中开启FPU</strong>

打开system_at32f4xx.c文件,找到函数void SystemInit (void),确保内核有开启FPU功能,如图1黑斜体字部分。

注意:程序中开启FPU是必要条件。若仅开启Keil或IAR上的FPU,程序中未开启,则程序运行时会进入hardfault.
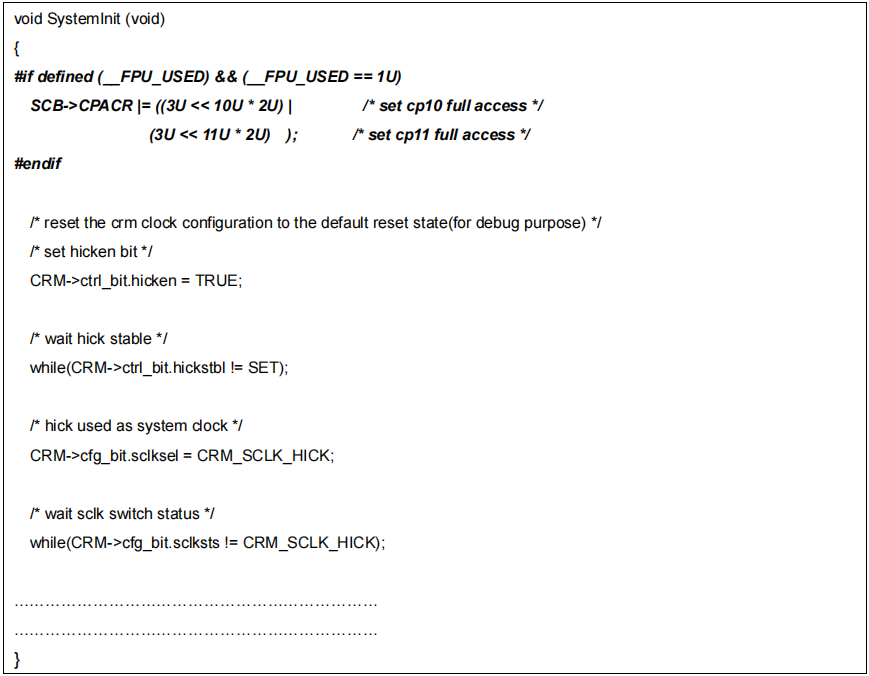
<center><img src="http://mcu.eetrend.com/files/2022-07/wen_zhang_/100562613-263836-1.png&…; alt=“图1. 程序中开启FPU" /></center><center><i>图1. 程序中开启FPU</i></center>

<strong><font color="#4e5e9e">Keil中配置FPU </font> </strong>

<strong>开启FPU</strong>

Options for Target->Target->Floating Point Hardware,选择Use Single Precision
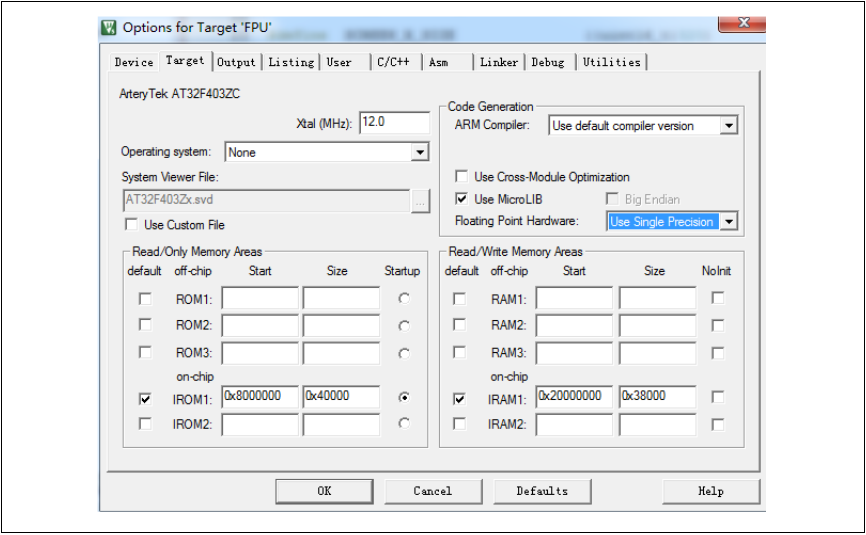
<center><img src="http://mcu.eetrend.com/files/2022-07/wen_zhang_/100562613-263837-2.png&…; alt=“图2. Keil开启FPU" /></center><center><i>图2. Keil开启FPU</i></center>

<strong>关闭FPU</strong>

Options for Target->Target->Floating Point Hardware,选择Not Used
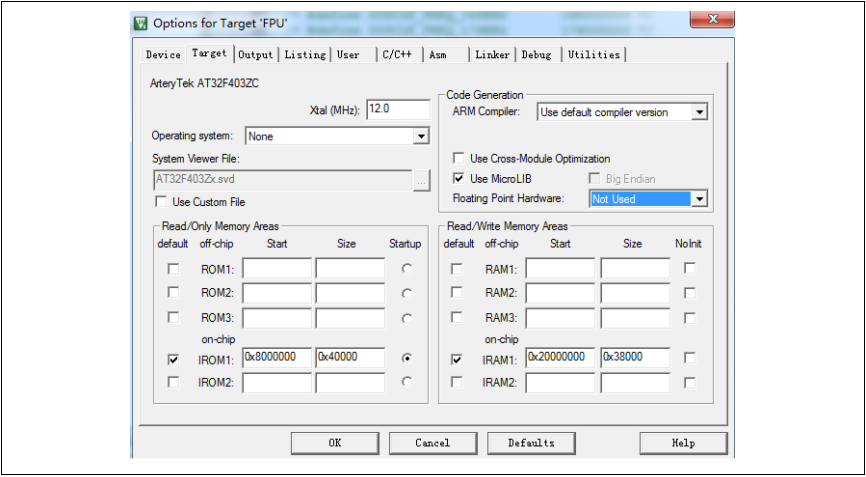
<center><img src="http://mcu.eetrend.com/files/2022-07/wen_zhang_/100562613-263838-3.png&…; alt=“图3. Keil关闭FPU" /></center><center><i>图3. Keil关闭FPU</i></center>

<strong><font color="#4e5e9e">IAR中配置FPU </font> </strong>

<strong>开启FPU</strong>

Options->General Options->FPU,选择VFPv4 single precision
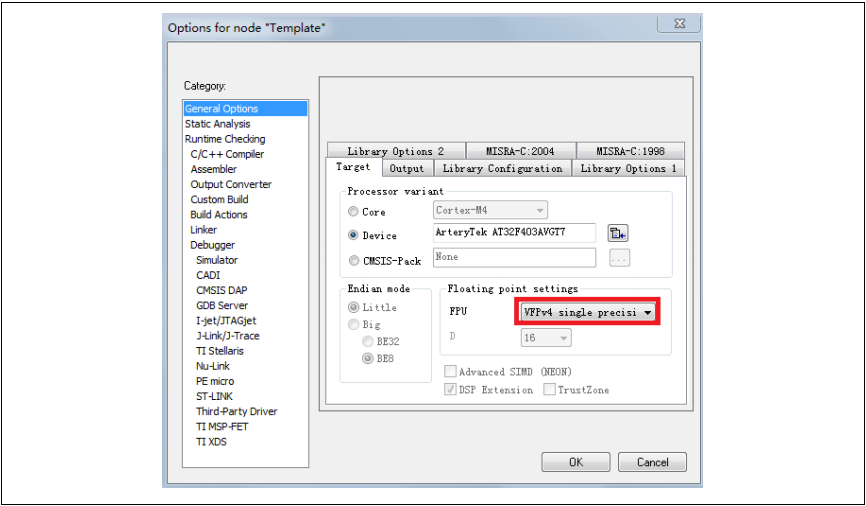
<center><img src="http://mcu.eetrend.com/files/2022-07/wen_zhang_/100562613-263839-4.png&…; alt=“图4. IAR开启FPU" /></center><center><i>图4. IAR开启FPU</i></center>

<strong>关闭FPU</strong>

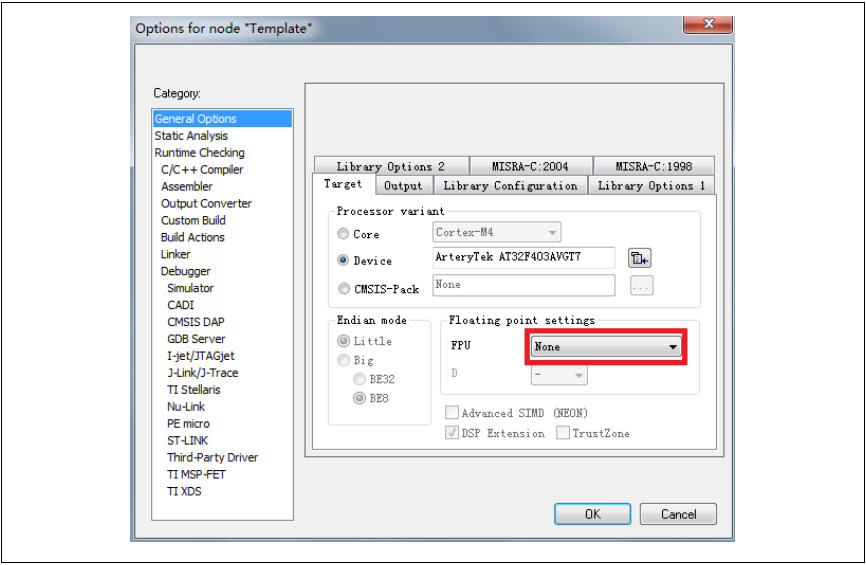
Options->General Options->FPU,选择None

<center><img src="http://mcu.eetrend.com/files/2022-07/wen_zhang_/100562613-263840-5.png&…; alt=“图5. IAR关闭FPU" /></center><center><i>图5. IAR关闭FPU</i></center>

来源:<a href="https://mp.weixin.qq.com/s/jqcc3cqAsZy2jlGK-Ll0yQ">AT32 MCU 雅特力科技</a>
免责声明:本文为转载文章,转载此文目的在于传递更多信息,版权归原作者所有。本文所用视频、图片、文字如涉及作品版权问题,请联系小编进行处理(联系邮箱:cathy@eetrend.com)。